Drywall Primer: Which One to Use and How to Apply It
Use a PVA primer or a general-purpose latex primer-sealer on new drywall and ordinary patches, a high-build primer over skim coats and rough repairs, and a shellac or oil-based stain blocker on water stains and torn brown paper. Roll on one even coat, let it dry, sand lightly and paint.
What you need
6 items needed · tick what you already own
- Sealing patched compound so paint doesn't look dull over it (flashing), and blocking water stains.
- Catching sanding dust and drips so the cleanup takes minutes.
- Sanding small patches by hand with less dust and fewer gouges than sandpaper.
- Raking light across the wall shows ridges and dips you can't see in normal light.
- Pressing spackle into nail holes, dents and small holes, and scraping off loose paper and paint.
- Sanding compound makes fine dust. Ceiling work drops it straight toward your eyes.
Popular picks on Amazon
- Zinsser Bulls Eye 1-2-3 primerWater-based primer-sealer for patches and painted walls. Stops flashing.
- Zinsser B-I-N shellac primerBlocks water stains and seals torn drywall paper before skim coating.
- KILZ PVA drywall primerLow-cost primer for new drywall and large skim-coated areas.
- Wooster 3/8" nap roller coverA good all-round nap for priming smooth or lightly textured walls.
Widely used options, not products we have tested. Check current reviews before you buy. As an Amazon Associate we earn from qualifying purchases. Disclosure
How to prime drywall
Before you cut, scrape or sand: in a home built before 1980, old joint compound and texture can contain asbestos, so have them tested by an accredited asbestos professional first (EPA). If the home was built before 1978, test the paint for lead before you sand or scrape it (EPA). Before cutting into a wall or ceiling, turn off power to nearby outlets, switches and fixtures and check for wires and pipes.
- Sand and dust off. Finish sanding your patches smooth. Then wipe the wall with a barely damp cloth or a dry microfiber pad. Primer over sanding dust peels and feels gritty.
- Set up. Lay a drop cloth and tape off trim. Stir the primer well. Pour it into a tray instead of dipping into the can.
- Cut in. Brush a 2–3" band along corners, ceiling and trim on full walls. For a spot patch you can skip the brush and roll only.
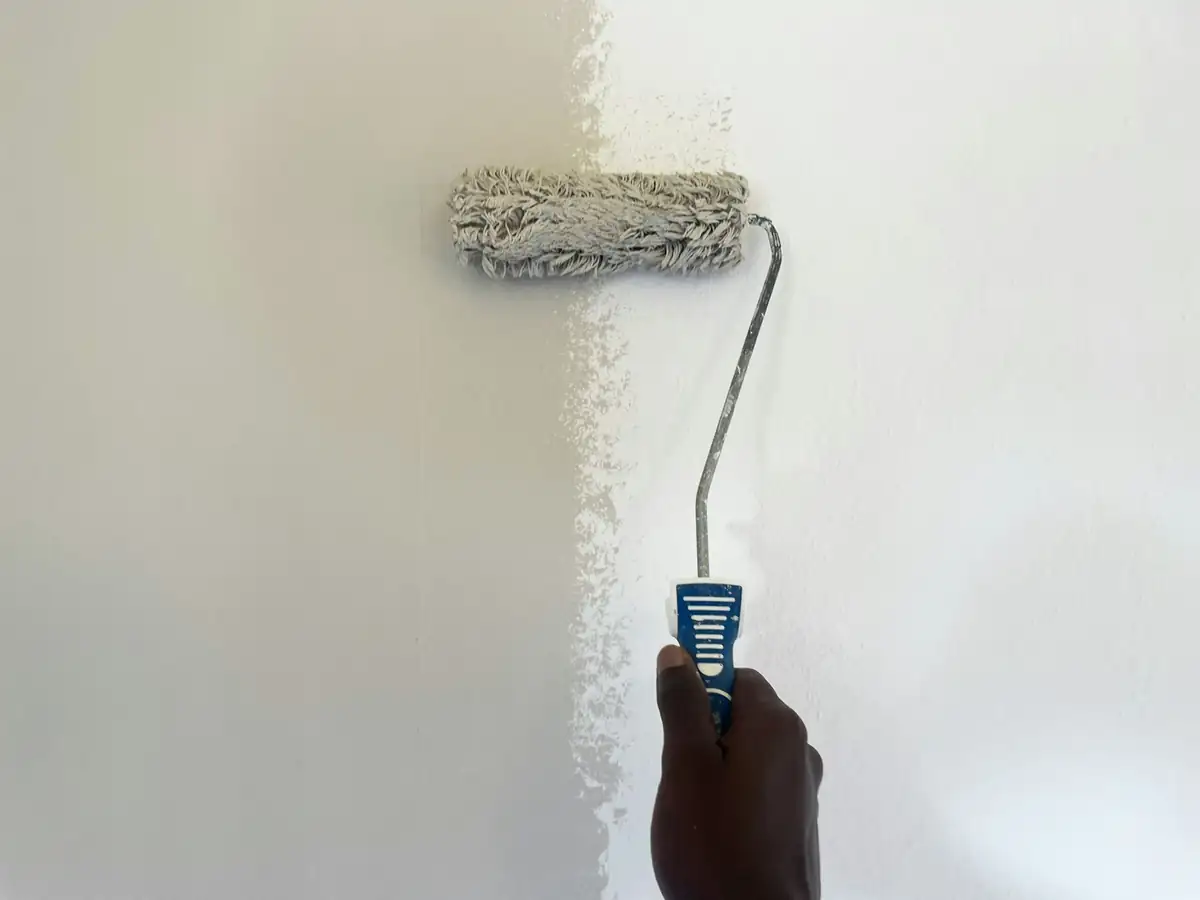
- Roll one even coat. On smooth walls use a 3/8" nap roller. On light texture use 1/2". Roll in a W pattern about 3' wide, then fill it in without lifting the roller, and finish with light strokes in one direction. Rolling a patch gives it the same fine stipple as the rolled paint around it, which a brush won't.
- Let it dry. Most latex primers are dry to the touch in about 30–60 minutes and ready for paint in 1–3 hours. Shellac is ready faster, oil-based slower. Go by the label, and give it longer in a cold or humid room.
- Check and sand lightly. Hold a work light flat to the wall. Fix pinholes or scratches with a dab of spackle. Then sand the primed areas lightly with a fine sanding sponge or 220 grit to knock down raised fibers. Don't sand through. If you do, spot prime that area again.
- Paint. Two finish coats, rolled wall to wall, give the most even result.
Why drywall needs primer
Drywall isn't one surface. It's paper with joint compound over the seams, screws and patches. Paper and compound are both porous, but not in the same way. Compound is thirstier, and it soaks up the binder from paint faster than the paper around it.
When paint dries on a surface that absorbed it unevenly, the sheen changes. The patch looks dull and flat while the rest of the wall has a soft glow. Painters call this flashing, and it's the most common reason a well-made patch still shows. Two coats of paint usually don't fix it, because the second coat lands on the same uneven base.
Primer seals the surface so the finish paint sits on top instead of soaking in. It also:
- Raises fuzz you can sand off. Sanded compound and scuffed paper leave tiny fibers. Primer stiffens them so a light sanding knocks them down.
- Shows flaws before the paint does. A primed wall has an even color, so ridges, pinholes and dips are easy to see with a light held flat to the wall.
- Helps paint stick. Bare compound is dusty. Paint over dust can peel, and new paint over glossy old paint can scratch off.
- Blocks stains, if you use the right type. Ordinary latex primer does not stop water stains from bleeding back through.
Types of drywall primer
Most of what's on the shelf falls into five groups. The label usually tells you which one it is, even if the front of the can is all marketing.
| Primer type | What it does | Best for | Skip it for |
|---|---|---|---|
| PVA drywall primer | Thin, inexpensive latex sealer made for bare drywall. Evens out porosity. | Large areas of new drywall, whole rooms | Stains, torn paper, glossy paint |
| General-purpose latex primer-sealer | Thicker than PVA with better adhesion. Seals compound and paper evenly. | Patches, spot priming, new drywall, previously painted walls | Water stains, smoke, brown torn paper |
| High-build primer (surfacer) | Heavy-bodied primer that fills fine scratches and sanding marks. | Skim coats, Level 5 work, walls with lots of small repairs | Stains (unless the label says it blocks them) |
| Shellac or oil-based stain blocker | Seals hard so water, tannins and paper can't bleed or swell. | Water stains, torn brown paper, marker, smoke | Large open areas (strong odor, more cost) |
| Self-priming paint | Thick paint sold as "paint and primer in one." | Repainting a wall that's already painted and sound | Bare compound and new drywall, where it can still flash |
PVA drywall primer
PVA (polyvinyl acetate) primer is what most contractors roll on new drywall. It's thin, goes on fast, and usually costs less per gallon than other primers. It does one job well: it seals fresh paper and compound so the finish paint absorbs evenly. It doesn't block stains and it doesn't fill anything. If you're priming a whole basement or addition of new drywall, PVA is the economical pick.
Drywall primer-sealer
A latex primer-sealer is the all-rounder for repairs. It has more solids than PVA, so it hides the color difference between gray patches and white paint, and it sticks well to old flat or eggshell paint. For spot priming a patch on a painted wall, this is the one to buy. A quart covers dozens of patches.
Stain-blocking primer
Water stains, marker and the brown paper under peeled wallpaper all bleed through latex. Shellac-based primer dries in under an hour and seals best. Oil-based primer works too but dries slower and smells longer. Use either only on the problem spots, with the window open. Make sure the leak is fixed and the drywall is dry and firm first; see water damaged drywall.
Which primer for new drywall
For a room of new drywall with a standard Level 4 finish (tape plus two coats on the seams, three coats on screws and corner bead), PVA or a latex primer-sealer is enough. Use one coat. If you plan to use semi-gloss paint or the wall gets light coming across it from a big window, step up to a high-build primer or have the wall skimmed first. The Level 5 finish guide explains when that matters.
Don't paint new drywall with self-priming paint and call it done. On bare paper and compound it often flashes at the seams, and you end up priming anyway.
Spot priming vs the whole wall
Spot prime when you have one to three small patches on a wall that's otherwise in good shape. Prime the patch and 2–3" of the painted wall around it, and feather the edge of the primer out with the roller so there's no ridge.
Prime the whole wall when:
- There are many patches, or one patch is bigger than about 2' across.
- You skimmed a large area or the whole wall. See skim coat drywall.
- The existing paint is semi-gloss or gloss. New paint needs a primer that bonds to glossy surfaces, or a light scuff sanding first. In a home built before 1978, test the paint for lead before you sand or scrape it (EPA).
- You're changing color a lot, such as going from dark to light.
- The finish paint is flat or matte and you want it perfectly even. Flat paint hides ridges but shows sheen differences.
How to avoid flashing on a patched wall
Flashing has two causes: uneven absorption and uneven surface texture. Primer handles the first. The rest is technique.
- Prime past the patch. Overlap 2–3" onto the old paint so the edge of the primed area isn't the edge of the patch.
- Use the same roller nap for primer and paint so the stipple matches.
- Paint the whole wall, corner to corner. Touching up only the patch almost always shows, even with leftover paint from the same can. Paint ages and its sheen shifts over time.
- Keep a wet edge. Work in sections and roll back into paint that's still wet. Lap marks over dried paint read as stripes.
- Two coats of finish paint. One coat over primer often looks fine wet and blotchy dry.
- Lower the sheen if it keeps happening. Eggshell and satin flash more than flat. Semi-gloss shows everything.
Drywall paint after priming
Any good interior latex wall paint works over primed drywall. Flat and matte hide surface flaws best and suit ceilings and low-traffic rooms. Eggshell and satin wipe clean, so they're common for hallways and kids' rooms. Semi-gloss is for trim, baths and kitchens, and it needs a very flat wall. You don't need special "drywall paint." You need a primed surface under ordinary paint.
Common mistakes
- Latex primer on a water stain. It comes back within days. Use shellac or oil-based stain blocker.
- Wet compound on torn brown paper. The paper bubbles. Seal it with shellac or oil-based primer before you put mud on it.
- Priming over dust. Wipe the wall first.
- Priming with a brush only. Brush marks show under paint as a different texture.
- Thinning the primer. Thinned primer doesn't seal as well, which defeats the point.
Related guides
- How to patch drywallHow to patch a hole in drywall: the right method for nail holes, doorknob holes and big holes, the tools you need,…
- Skim coat drywallHow to skim coat drywall with joint compound: when a wall needs it, sealing torn paper, thinning the mud, roller…
- Water damaged drywallWater damaged drywall repair: how to dry the wall, test it with a moisture meter, decide patch or replace, cut out…
- Sanding drywallSanding drywall the right way: when to use a sponge, pole sander or drywall sander, which grit to use, wet…