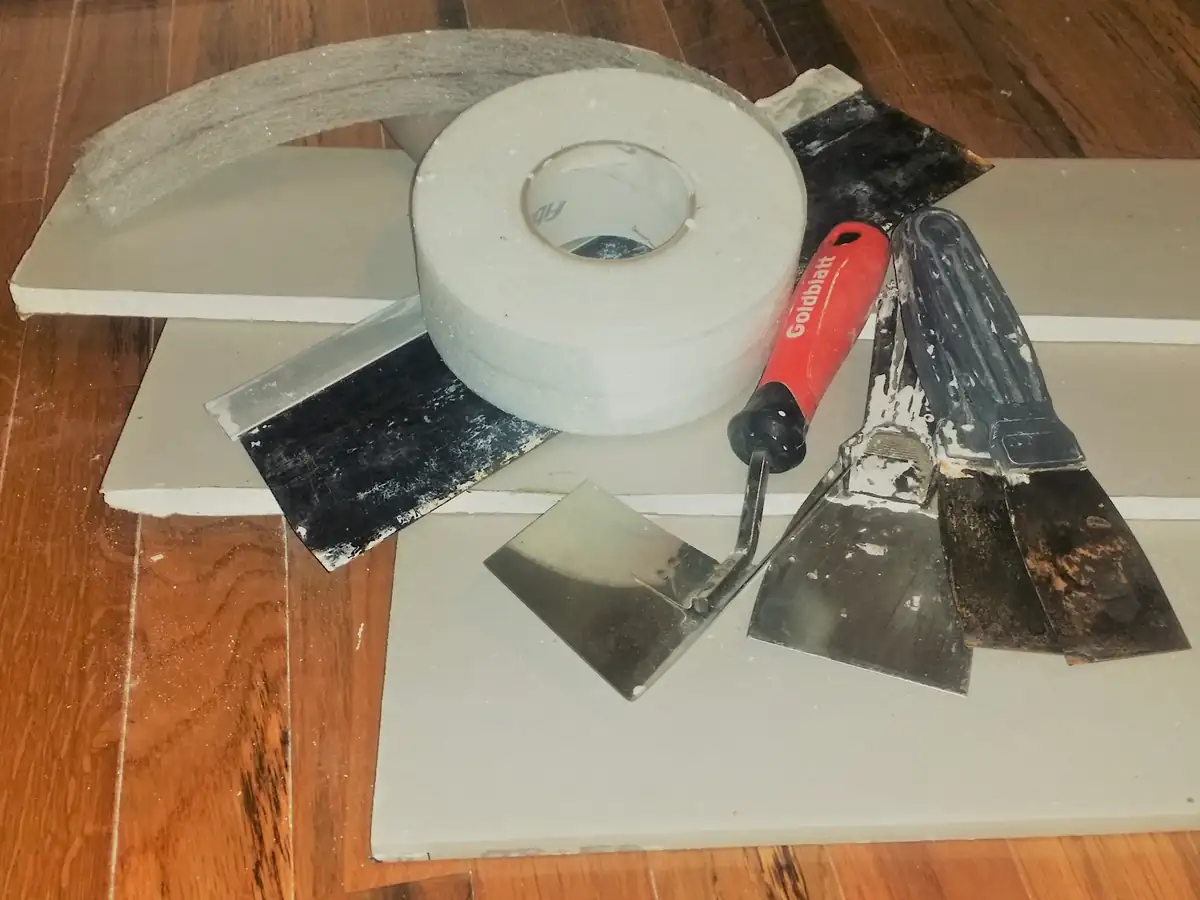
The starter kit is a 1½–3" putty knife, a 6" taping knife, a mud pan, a utility knife, lightweight spackle, all-purpose joint compound, a self-adhesive mesh patch and a sanding sponge. That handles nail holes, dents, doorknob holes and most cracks. Large holes add a drywall saw, repair clips, screws and a piece of drywall.
Pressing spackle into nail holes, dents and small holes, and scraping off loose paper and paint.
Bedding tape, first coats over patches and cracks, and most repairs up to about 4" wide.
Holding a working amount of compound so you can load and clean your knife on its edge.
Cutting loose paper, scoring drywall, trimming torn tape and opening cracks into a shallow V.
Nail holes, screw holes, dents and holes up to about 1" (our rule of thumb; some spackles are labeled for larger holes, so follow the label). It dries fast and barely shrinks.
Skim coats over patches and tape, and feathering repairs wider. Sands easily.
Covering holes about 1½" to 6" across without cutting the wall open. You skim compound over it.
Sanding small patches by hand with less dust and fewer gouges than sandpaper.
Then add primer before paint, plus a drop cloth and an N95 mask for sanding. You may already own those. If you're not sure what repair you're facing, the Repair Finder builds the exact list for your damage.
Tools needed for each repair
Every repair starts with the same core. The differences are in the patch material and the cutting tools.
Knives do almost all the work, so this is where better quality pays off. Start with a putty knife and a 6" knife. Add a 10" or 12" knife once you patch anything bigger than a nail hole, because wide final coats are what make a patch vanish.
Putty knife (1½–3")Starter kit
Use it for Pressing spackle into nail holes, dents and small holes, and scraping off loose paper and paint.
Look for A flexible steel blade, not stiff. Stiff blades are for scraping and leave ridges in filler. Get one with a smooth, unbent edge.
6" taping knifeStarter kit
Use it for Bedding tape, first coats over patches and cracks, and most repairs up to about 4" wide.
Look for A stainless blade (it won't rust between jobs) with a slight flex. If you buy only one drywall knife, buy this one.
10" or 12" finishing knife
Use it for Wide final coats that feather a patch or seam into the wall so it disappears under paint.
Look for A thin, flexible blade with a straight edge. Sight down it before you buy: a bowed blade leaves lines.
Mud panStarter kit
Use it for Holding a working amount of compound so you can load and clean your knife on its edge.
Look for A 12" or 14" pan with a straight, hard edge. Stainless or plastic both work; stainless cleans more easily.
Inside corner knife
Use it for Smoothing compound on both sides of an inside corner at once, for cracked corner joints.
Look for A 90° or slightly over-bent (103°) blade. Optional for one repair; you can do each side with a 6" knife instead.
Is a drywall taping tool set worth it?
A typical drywall tool kit or taping tool set bundles a 6", 10" and 12" knife with a pan, sometimes a corner knife and a hawk. It makes sense if the blades are stainless and the set includes the sizes you'd buy anyway. Skip sets padded with plastic knives or tools you won't use on a repair.
Patches and tape
The hole size picks your patch. Mesh patches cover holes up to about 6". Bigger holes get a new piece of drywall held by clips or backer strips, and the seams get taped.
Self-adhesive mesh patchStarter kit
Use it for Covering holes about 1½" to 6" across without cutting the wall open. You skim compound over it.
Look for A patch at least 2" bigger than the hole on every side. Aluminum-backed patches are stiffer and better over doorknob holes.
Drywall repair clips
Use it for Holding a new piece of drywall in a cut-out hole when there's no stud to screw into.
Look for Clips sized for your drywall thickness (usually ½"). Most packs include the screws.
Fiberglass mesh tape
Use it for Self-sticking tape for cracks and flat patch seams. Easy for beginners because nothing has to be bedded first.
Look for A standard 1⅞" or 2" roll. Use it with setting-type compound for the first coat; mesh with premixed mud cracks more often.
Paper drywall tape
Use it for Seams, inside corners and recurring cracks. It's stronger than mesh once bedded properly.
Look for Tape with a center crease so it folds cleanly into corners. Bed it in a full layer of compound or it will bubble.
Drywall panel or patch piece
Use it for Filling holes larger than about 6", and California (butterfly) patches.
Look for The same thickness as your wall: ½" for most walls, ⅝" for many ceilings and garages. Measure at an outlet cutout.
Compounds and fillers
Spackle fills small holes in one or two passes. Joint compound covers patches and tape in thin, wide coats. Setting compound hardens by chemical reaction, so you can finish in a day. See joint compound vs spackle and types of drywall mud for the details.
Lightweight spacklingStarter kit
Use it for Nail holes, screw holes, dents and holes up to about 1" (our rule of thumb; some spackles are labeled for larger holes, so follow the label). It dries fast and barely shrinks.
Look for A lightweight formula for small holes. Pink-to-white color-change spackle tells you when it's dry enough to sand.
All-purpose joint compound (premixed)Starter kit
Use it for Skim coats over patches and tape, and feathering repairs wider. Sands easily.
Look for A small 1–3 quart tub is plenty for a few repairs. Lightweight versions sand easier and shrink less.
Setting-type compound (hot mud)
Use it for Filling deep holes and gaps, the first coat over mesh tape, and repairs you want to finish in one day.
Look for The number is the working time in minutes. A 20 or 45 minute powder is easiest for one repair. Easy-sand types are worth it.
Drywall primer or stain-blocking primer
Use it for Sealing patched compound so paint doesn't look dull over it (flashing), and blocking water stains.
Look for PVA or general-purpose primer for patches. For water stains, use a stain-blocking primer (shellac or oil-based).
Spray texture (aerosol)
Use it for Matching orange peel, knockdown or popcorn texture over a repair.
Look for A can with an adjustable nozzle and the right texture type. Test on cardboard first to dial in the spray size.
Cutting and fastening
You need these only for large holes, water damage and nail pops. A sharp utility knife is the exception: it belongs in every repair.
Utility knifeStarter kit
Use it for Cutting loose paper, scoring drywall, trimming torn tape and opening cracks into a shallow V.
Look for A knife with snap-off or easy-change blades. A sharp blade cuts paper cleanly instead of tearing it.
Drywall saw (jab saw)
Use it for Cutting damaged drywall out to a clean square or rectangle before you patch.
Look for A pointed blade that can punch through drywall. Check for wires and pipes before you cut.
Drill or driver
Use it for Driving screws into backer boards, repair clips and studs, and fixing nail pops.
Look for Any cordless drill works. A drywall dimpler bit sets screws just below the surface without tearing the paper.
Drywall screws
Use it for Attaching patch pieces and backer boards, and re-securing popped nails.
Look for 1¼" coarse-thread screws for ½" drywall on wood studs. Fine-thread screws are for metal studs.
Before you cut: check for wires, pipes and ducts. Cut a small inspection hole, look inside with a flashlight, and switch off power to nearby outlets and switches.
Sanding and finishing
Sand lightly. Most repairs need a sanding sponge and nothing else. A work light held flat to the wall shows the ridges you missed.
Sanding spongeStarter kit
Use it for Sanding small patches by hand with less dust and fewer gouges than sandpaper.
Look for A fine-grit sponge, or a dual-grit sponge used on the fine side. Follow the sanding guidance on your compound's label, and save coarser grits for hard setting compound or heavy ridges. A damp sponge can smooth compound with almost no dust.
Pole sander
Use it for Sanding ceiling repairs and long seams without a ladder at every step.
Look for A swivel head with clamp-in sanding screen. Screen (mesh) doesn't clog like sandpaper does.
Bright work light
Use it for Raking light across the wall shows ridges and dips you can't see in normal light.
Look for Any LED work light you can hold at a low angle to the wall. A phone flashlight works in a pinch.
Prep and safety
Compound dust is fine and gets everywhere. Cover the floor, wear a mask, and wear glasses for anything overhead.
Drop cloth and painter's tape
Use it for Catching sanding dust and drips so the cleanup takes minutes.
Look for A canvas or plastic cloth plus painter's tape for the floor edge and nearby trim.
Dust mask (N95) and safety glasses
Use it for Sanding compound makes fine dust. Ceiling work drops it straight toward your eyes.
Look for A NIOSH-approved N95 or better and glasses that seal reasonably well. If the home may have asbestos, don't sand old compound or texture until it's tested by an accredited asbestos professional. For paint that tested positive for lead, EPA recommends an N-100 respirator.
Moisture meter
Use it for Checking that drywall has dried out after a leak before you patch and paint.
Look for A pin-type meter with a drywall setting. Compare the wet area to a dry wall in the same room.
Older homes: joint compound and textures in homes built before 1980 can contain asbestos. Have them tested by an accredited asbestos professional before you sand, scrape or cut (EPA). If your home was built before 1978, test the paint for lead before you sand or scrape it (EPA, Lead-Safe Practices for Do-It-Yourselfers, checked November 2026). If a ceiling sags or the drywall is soft from a leak, fix the cause first and call a pro for anything structural or for widespread mold.
Tools you can skip
Professional drywall tools are built for speed across whole houses. On a one-off repair they're overkill for the job and often take longer to set up and clean than the repair itself.
Pro tool
What it does
Use instead
Banjo (taping machine)
Coats paper tape with mud as you pull it out
Bed tape by hand: a layer of compound with a 6" knife, press the tape in, scrape it flat
Automatic taper (bazooka)
Applies tape and mud to long seams in one pass
Hand taping with a 6" knife. A repair has a few feet of seam, not a few hundred
Hawk and trowel
Holds a big load of mud for fast skim coats and wide joints
A 12" or 14" mud pan and your 6" and 10" knives
Power drywall sander
Sands large areas fast, usually with a vacuum hookup
A sanding sponge, or a damp sponge for almost no dust. A pole sander for ceilings
Drywall stilts
Put you at ceiling height without a ladder
A sturdy step ladder. Stilts take practice and are a real fall risk
Drywall lift
Raises full sheets onto ceilings
Repair clips or backer strips and a helper for ceiling patches. Rent a lift only to replace whole ceiling sheets
Mud mixer paddle
Mixes powder and remixes buckets in a drill
Stir premixed compound with your knife. Mix small batches of setting powder by hand in a pan or small bucket
Drywall installation tools vs repair tools
Drywall installation tools for hanging new walls include a 4' T-square, a screw gun, a rasp, a rotary cut-out tool and a corner bead crimper on top of the finishing tools. For repairs, a straightedge or level, a drill and a drywall saw cover the same jobs on a smaller scale.
What lasts and what gets used up
The knives, pan, saw and sander last for years. Only the compound, patches, tape and sponges get used up. For a single small hole, a prepackaged kit is the simplest buy. See drywall repair kits to compare.
Buying and care tips
Buy stainless blades. Carbon steel knives rust between jobs, and rust spots leave streaks in fresh compound. Stainless resists rust and lasts for years.
Check the edge in the store. Sight down the blade: it should be dead straight with no bow. Run a fingertip along the edge for nicks. A nicked or bent knife leaves lines in every coat.
Prefer flexible over stiff. A taping knife should flex a little when you press the corner on a flat surface. Stiff blades are scrapers and leave ridges.
Clean tools while the mud is wet. Scrape the knife on the pan edge, then wash knives and pan in a bucket of water. Dry the blades right away.
Keep compound out of the drain. Let the wash bucket settle overnight, pour the clear water onto gravel or bare soil, and throw the sludge in the trash once it dries. Setting compound hardens in pipes and traps.
Store it right. Hang or lay knives flat so the blades don't bend. Press plastic onto opened compound, close the lid tight, and keep it from freezing.